Monday, September 5, 2011

let's cook a chicken to a tender rawness

ok so I grabbed the bull by the horns and decided to jump right into cooking by trying to cook like a grown-up and figured that cooking an entire chicken would make me one. Not only would it allow me to practice my cooking skills but I would also be able to show everyone how to stretch a chicken dinner over the course of a week by making a chicken one night, having left-overs, then chicken sandwiches and then chicken soup...but it didn't turn out that way.
but I didn't know that when I started the dish...So me and Jacob started by cleaning out the 'cavity' and putting the livers, lungs, hearts and necks all in a separate bag and throwing them away. If I had been making a soup I might have kept the neck because it's great for making the stock.
and then we put it on a medium sized tray about an inch high.
however, as much as I want to cook chicken I have a very hard time doing it. It just looks so alive to me with it's little wings. Every time I look at it I picture it waddling towards me or trying to flap away. But one must get over their fears so I continued...
Chicken is very versatile when it comes to flavoring and seasoning. Personally, I enjoy simply flavored chicken, so I just used a little bit of garlic powder, salt, and pepper. This time I also used a small amount of steak seasoning to give it that smoky flavor and I also used crushed rosemary.
Although it might seem expensive or hard to get, rosemary, as well as other herbs are very easily located in the produce section of the grocery, all ranging from 99 cents to 2 dollars, depending on the amount and brand of herb you choose to use.
so I crushed the rosemary up, after removing it from the stem.
I then added about a tablespoon of water in the bottom of the pan. I always do this to make sure it stays moist.
after adding all the spices to a bowl..
...I mixed them up.
whenever I'm making any dish that takes longer than 15 minutes, I usually cut up some hors d'oeuvres. It's nice to keep some apples and crackers around just for this reason. 
anyway, back to our chicken failure. We made our first mistake by not having a microwave. I like to cover the chicken in either olive oil or softened butter to make the spices stick. Since we wanted butter, but didn't have a microwave, we softened the butter on the stove, but forgot about it about 2 seconds too late and it was melted. We attempted to put it in the freezer but it didn't really work so we started slathering the bird in half melted butter.
ta da! But the fun didn't stop there...
we then patted and rubbed the spices onto the chickens body...
...making sure that each spot was covered.
like so.
then I partially covered it in tin foil to retain the moisture when it cooked.
and popped it in the oven, at 350 degrees for an hour.
little did I know what was about to happen..
...but I didn't know so I heated up the rice from the night before as well as some mixed veggies in a sort of stir fry.
and then an hour passed and we took the chicken out, figuring it was done.
I mean it looked done...kinda.
so I figured we had planned everything perfectly and all the food had come out together so I put the rice mixture in a serving bowl...
...but my excitement faded as soon as we started cutting the chicken.
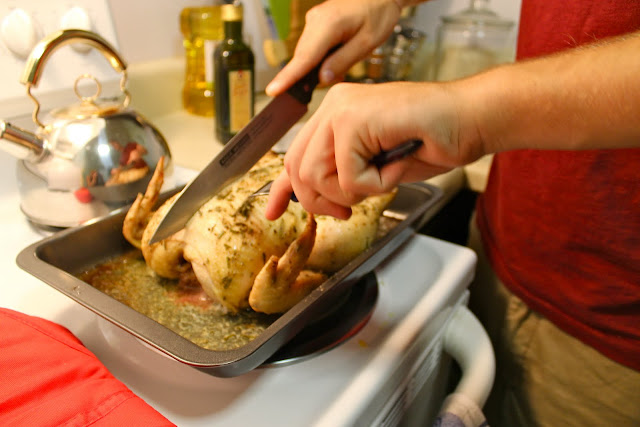
Jacob cut it down the middle, just like you're supposed to, but we weren't sure if it was done.
so we sliced the breast, and tried a bit...a very small bit I might add.
and we figured it was done, so Jacob started slicing and when he got to the middle...it was bloody...yes bloody and raw...and we just about gave up. We threw it in the oven at 375 degrees for another half an hour, cut it up, put it in tupperware and called it a day. I'm pretty sure the only mistake was that it wasn't cooked for long enough on a high enough heat. And although I want to do this again to show you all how to stretch a chicken over the course of a week, I'm not sure I'll be able to look at a chicken again for a while.

Sunday, September 4, 2011

first family dinner...in heels ;)

so here is a simple, cheap, vegetarian friendly, delicious recipe to make, that also makes great left-overs. It's called 'My mom's false alarm chili'. To make things easy, especially for a college student,  buy a pre-made chili flavoring box. My mom uses Wick Fowler's False Alarm Chili. It's in a yellow box in the grocery, near the Mexican spices, you can't miss it. If you don't feel like spending the money, it's about 2-3 dollars, the ingredients consist of chili pepper, corn masa flour, salt, onion, cumin, paprika, oregano and garlic. 
Since rice takes a while to cook, you can put it on before you start making the chili. If you have a rice steamer like I do, just put some water in the bottom, about a cup and then fill the top with however much rice you like. Since I was cooking for 5, and planning on feeding them left overs, I used about a half a bag. 
anyway, then you make the chili. You can basically follow the directions on the back of the box. It does call for ground beef but since my friend Erika and her boyfriend Mark are vegetarians I substituted beans instead. Besides, my mom has always made it vegetarian and it's a nice break from meat. But if you do prefer it you can add ground beef, ground chicken, whatever you feel in the mood for. 
so you fill the bottom of the pot with about half an inch of water and start pouring the spices in, in any particular order you like.
like so
then my mom adds a can of sliced, peeled tomatoes and a can of tomato paste to the mixture. 
like so
if you're cooking in a college apartment kitchen like I am, be sure to get a fan and place it so it rotates from the stove to you. It gets super hot, super fast, and the fans above the stove don't always work that well ;)
and just a little piece of information, always keep your knives sharp and always dress to impress in the kitchen ;)
but anyway, next I added the beans. These are pink beans and I always use Goya brand. I added 4 different cans beans, all strained slightly. Beans are great to add because not only are they cheap, ranging from 79 to 89 cents, but they also stand up well in the chili while also providing great nutritional value. 
next I added kidney beans
then black beans
and finally chick peas. I love adding chick peas to the chili and I would suggest adding two cans if you love them as much as I do. They had a firmness to the chili that the other beans are lacking, and they also add a great flavor to the dish. 
and then you stir it all together, cover it and let it simmer for about 30 minutes, easy!
usually college apartments are kind of plain, so dress your dining area up with a table cloth and place mats. I got a white table cloth because it's easy to bleach, and you can mix and match it with different occasions. It's also great to have fun place mats because it adds a pop of color to the room. For the center piece I simply took a glass vase, and filled it with a garland of plastic sunflowers. It's cheaper than buying real flowers and lasts longer as well.
oh and don't forget the music! Definitely invest in a stereo. It makes cooking, and cleaning up afterwards, much more fun :)
then I washed the empty bean cans 
and threw them away. A great piece of advice my mom always reminds me of is clean as you cook, that way the end clean up is way easier. 
then get someone strong, like your boyfriend, to be in charge of opening the wine :)
It's also fun to have everyone dress up and get together. It nice to do once a week and have a little family dinner.
like so 
but no chili is complete without corn bread. I use Jiffy corn bread mix which only needs a little milk and an egg added to it and takes about 15 minutes to cook and tastes great every time. 
then you lay it all out and ta-da you have a little buffet of delicious food that only took about 45 minutes to make and cost about 10 dollars to buy. 
then you serve it all up, add a little sour cream on the side and you have a deliciously hearty meal that makes awesome left overs...
...and feeds everyone :)